You’ve probably got a bottle of white vinegar sitting in your pantry right now. It might be there for making salad dressings or perhaps for that one time you tried to pickle something. But what if I told you that this humble, inexpensive liquid is a cleaning powerhouse, capable of tackling messes in virtually every room of your home? Forget those expensive, chemical-laden cleaners with their long lists of unpronounceable ingredients. You can unlock a world of sparkling surfaces and fresh scents with nothing more than white vinegar and a few simple additions. This isn’t just about saving money; it’s about choosing a more natural, effective, and surprisingly versatile way to keep your living space pristine.
Consider the sheer volume of cleaning products that accumulate under your sink. Each one promises a specific miracle for a specific surface. You’ve got your glass cleaner, your bathroom scrub, your all-purpose spray, your degreaser… the list goes on. Yet, so many of these rely on harsh chemicals that can irritate your skin, lungs, and even damage surfaces over time. You’re breathing them in, wiping them onto your food preparation areas, and potentially washing them down the drain, contributing to environmental concerns. It’s enough to make you want to throw your hands up and just live in a state of perpetual mild mess.
But there’s a better way, a way that taps into the natural acidity of vinegar to break down grime, cut through grease, and neutralize odors. You might be surprised at just how effective a simple solution of vinegar and water can be. It’s a secret weapon that your grandparents likely knew and used extensively, and it’s time you rediscovered its brilliance. This guide will walk you through creating your own DIY vinegar cleaning solutions for every corner of your home, empowering you to clean smarter, not harder. Prepare to be amazed by the sheer efficacy and versatility of this kitchen staple.
Your kitchen is the heart of your home, but it’s also a prime location for grease splatters, food residue, and stubborn water spots. From the stovetop to the sink, the counters to the cabinets, you want a clean and hygienic space for preparing meals. Vinegar’s natural degreasing properties make it an ideal candidate for tackling these daily challenges. You can transform your kitchen cleaning routine from a chore into a satisfying exercise in natural detoxification.
All-Purpose Kitchen Cleaner: Your Countertop Companion
This is your go-to for everyday wiping and disinfecting. It’s gentle enough for most surfaces but strong enough to combat common kitchen messes. You’ll find yourself reaching for this spray bottle countless times a day.
Crafting the Perfect All-Purpose Blend
To create your all-purpose marvel, you’ll need white vinegar and water. The ratio is simple: one cup of white vinegar to one cup of water. This is your foundational mixture. Now, if you’re not a fan of the inherent aroma of vinegar (and let’s be honest, it can be a bit pungent straight up), this is where you can introduce a touch of natural fragrance. Add about 10 to 20 drops of your favorite essential oil. Lemon oil is a classic for a reason – its bright, zesty scent is uplifting and inherently associated with clean. Spruce or even peppermint can also add a refreshing twist. Simply combine these in a clean spray bottle and shake well before each use. This solution is fantastic for wiping down your countertops, cleaning the inside of your microwave, de-greasing your sink, and even giving your appliances a quick shine. It’s your daily companion for maintaining a fresh and clean kitchen environment.
Important Note on Kitchen Surfaces
While this all-purpose cleaner is incredibly versatile, it’s crucial to acknowledge that not all kitchen surfaces are created equal. Avoid using vinegar-based cleaners on natural stone surfaces like granite or marble. The acidity in vinegar can etch and dull the finish of these porous materials, leading to permanent damage. For granite and marble, it’s best to stick to specialized cleaners or a simple solution of mild dish soap and water. Always test any new cleaner on an inconspicuous spot first to ensure compatibility with your specific countertop material.
Tackling the Sink and Stovetop
Your kitchen sink and stovetop bear the brunt of cooking and dishwashing. For those stubborn food bits and grease stains, your trusty all-purpose blend will often do the trick. However, for those moments when you need a little extra power, you can use straight white vinegar. Pour a small amount directly onto a cloth or sponge and scrub the affected areas. The acidity will help to break down any baked-on food or greasy residue. Rinse thoroughly with water afterwards to remove any lingering vinegar scent. For a brilliant shine on stainless steel sinks and stovetops, a quick wipe with your all-purpose vinegar solution, followed by a dry buff, will leave them gleaming.
Trash Can Deodorizing: Eliminating Odors Naturally
The trash can is a necessary evil, and unfortunately, it can become a breeding ground for unpleasant odors. Instead of masking the smell with artificial fragrances, why not eliminate the source? Vinegar’s deodorizing properties are incredibly effective.
Vinegar as a Natural Deodorizer
Simply spray your all-purpose vinegar solution generously inside your trash can, ensuring you get into all the nooks and crannies. Let it sit for a few minutes to allow the vinegar to work its magic. The acetic acid in vinegar neutralizes alkaline odor molecules, effectively eliminating the smells rather than just covering them up. Wipe down the inside and outside of the can with a clean cloth, and then let it air dry completely before replacing the trash bag. You can also place a small dish of vinegar inside an empty trash can that’s not in use to keep it smelling fresh. Regular deodorizing will make a significant difference in the overall freshness of your kitchen.
The Bathroom: Banishing Soap Scum and Mildew
Your bathroom is a place of hygiene and relaxation, but it’s also a prime territory for water spots, soap scum, and the dreaded mildew. The high moisture environment can make these issues a constant battle. Thankfully, vinegar’s acidic nature makes it a potent weapon against these bathroom nuisances. You can achieve a sparkling clean bathroom without resorting to harsh chemicals that can leave a lingering, unpleasant odor and potentially harm your respiratory system.
Bathroom and Shower Cleaner: For a Deep Clean
Battling soap scum and hard water stains in the bathroom requires a slightly more robust approach than your everyday all-purpose cleaner might provide. This solution is designed to cut through the buildup and leave your fixtures and surfaces gleaming.
The Power Duo: Vinegar and Alcohol
For a truly effective bathroom cleaner, you’ll want to combine white vinegar with isopropyl alcohol. A good starting point is to mix one-third cup of white vinegar, one-third cup of isopropyl alcohol, and one-third cup of water. This combination is excellent for cleaning bathroom counters, sinks, faucets, and even toilets. The alcohol helps to disinfect and speed up drying, while the vinegar tackles the grime. Add a few drops of lemon oil or another uplifting essential oil to mask the alcohol and vinegar scent and leave a pleasant fragrance. This mixture is fantastic for general cleaning and disinfection in your bathroom.
Tackling Stubborn Soap Scum with Vinegar and Dish Soap
When it comes to particularly stubborn soap scum on non-porous surfaces like your shower walls or tub, you can employ a potent vinegar and dish soap mixture. For this, you’ll want to heat about one cup of white vinegar until it’s warm, but not boiling. Then, mix this warm vinegar with an equal amount of liquid dish soap (so, one cup of dish soap). This creates a powerful cleaning paste that’s exceptionally good at dissolving soap scum. Apply the mixture directly to the affected areas using a sponge or cloth, let it sit for 10-15 minutes to allow the vinegar and soap to work their magic, then scrub with a non-abrasive scrub brush or sponge. Rinse thoroughly with water. The warmth of the vinegar helps to loosen the grime, and the dish soap cuts through the greasy residue.
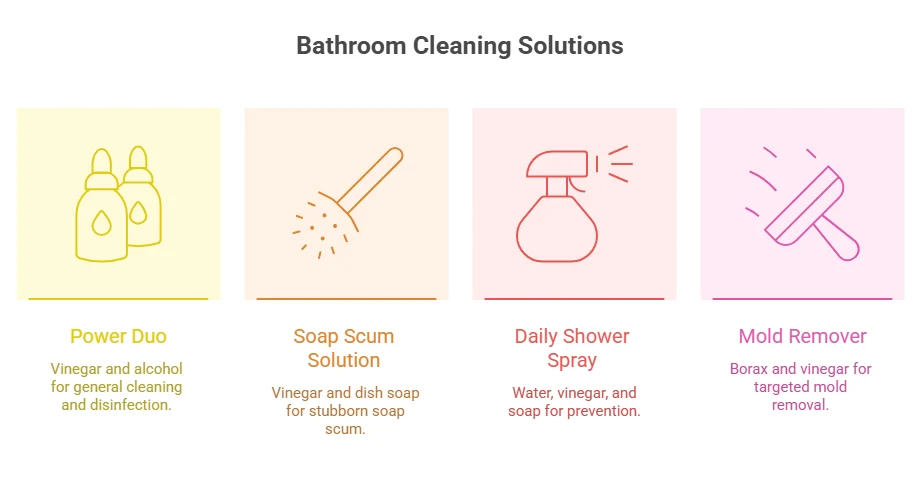
Daily Shower Spray for Prevention
Preventing soap scum and mildew buildup is often easier than removing it. A daily shower spray can make a world of difference. This is a super simple, preventative measure that takes seconds to use.
The Simple Water, Vinegar, and Soap Mix
In a clean spray bottle, combine one cup of water, half a cup of white vinegar, and one teaspoon of liquid dish soap. You can also add a squeeze of fresh lemon juice for extra cleaning power and a fresh scent. After each shower, give your shower walls, doors, and floor a quick mist with this spray. The vinegar helps to break down the mineral deposits from water and the residue from soaps, while the dish soap helps to lift away any lingering grime. Simply let it air dry or give it a quick wipe with a squeegee. This simple habit will significantly reduce the amount of scrubbing you need to do later.
Mold Remover: When Mildew Takes Hold
Even with regular cleaning, mold can sometimes creep into damp bathroom corners. Vinegar is a natural disinfectant and can effectively kill mold spores on non-porous surfaces.
Borax and Vinegar: A Potent Combination
For a more targeted mold removal solution, mix one part borax with four parts white vinegar. This creates a powerful paste or spray (depending on how much vinegar you use). Apply the mixture to the moldy areas, ensuring good coverage. Let it sit for at least one hour to allow the vinegar to kill the mold spores and the borax to help lift and clean. After an hour, scrub the area with a brush and wipe it clean with a damp cloth. Rinse thoroughly and ensure the area is well-ventilated to promote drying. Remember, while effective, it’s always best to address moisture issues in your bathroom to prevent mold from returning.
Glass Shower Doors: Cutting Through Water Spots and Soap Film
Glass shower doors are notorious for accumulating a chalky film of soap scum and hard water spots that can be incredibly difficult to remove.
The Gentle Yet Effective Vinegar and Dish Soap Approach
For your glass shower doors, you can use a diluted version of the vinegar and dish soap mixture. Mix one part white vinegar with one part dish soap, and then dilute this with an equal part of water (so, a 1:1:1 ratio of vinegar to dish soap to water). Spray this solution generously onto the glass doors. Let it sit for about 3 to 5 minutes to allow the ingredients to break down the film. Then, use a non-abrasive sponge or cloth to scrub the doors. Rinse thoroughly with water and dry with a clean, lint-free cloth or squeegee for a streak-free finish. This method is effective without being overly harsh on the glass.
Windows and Mirrors: Achieving a Streak-Free Shine
Crystal-clear windows and sparkling mirrors can dramatically brighten a room and create a sense of openness. However, achieving that perfect, streak-free finish can be a frustrating endeavor, often leading to more smudges than before.
Your Go-To Window and Mirror Cleaner
This is a classic for a reason. The simple combination of vinegar and water is incredibly effective at cutting through dust, fingerprints, and streaks.
The Simple Vinegar and Water Solution
For your windows and mirrors, you’ll want a slightly less concentrated vinegar solution than your all-purpose kitchen cleaner. A good ratio is one part white vinegar to three to four parts water. This is your base. If you’re dealing with particularly grimy windows or mirrors, you can add about half a teaspoon of mild liquid dish soap to the mixture. The dish soap helps to lift stubborn dirt and emulsify grease. For an extra touch of freshness, add one to two drops of essential oil, such as lemongrass, which has natural cleaning properties and a pleasant aroma. Pour this mixture into a clean spray bottle. Spray lightly onto the surface you are cleaning, and then wipe with a squeegee or a clean, lint-free cloth (microfiber cloths work beautifully here) for a perfect, streak-free shine.
Tips for Streak-Free Success
When cleaning windows, it’s often best to work on a cloudy day or when the windows are not in direct sunlight. Direct sunlight can cause the cleaning solution to dry too quickly, leading to streaks. Always start by wiping away any loose dust or debris with a dry cloth before applying your vinegar solution. Work in a systematic pattern, using your squeegee with overlapping strokes. Immediately wipe the edge of your squeegee with a clean cloth after each stroke to prevent carrying dirt and moisture to the next section. For mirrors, a simple spray and wipe with a microfiber cloth is usually all you need once you’ve got your vinegar solution dialed in.
The Citrus-Infused Window Cleaner: A Light, Refreshing Option
If you prefer a subtler scent or want to take advantage of the cleaning power of citrus, consider an infused vinegar cleaner. This takes a little planning but is well worth the effort.
Steeping Citrus Peels for a Gentle Clean
To create a citrus-infused vinegar cleaner, you’ll need equal parts white vinegar and water. The key here is to infuse the vinegar with the essence of citrus. Collect citrus rinds – lemon, orange, grapefruit, or lime – from fruits that you’ve used for juicing or eating. Place the citrus rinds into a jar and pour the white vinegar over them. Seal the jar tightly and let it sit for at least a few days, or even up to a week, allowing the oils and scents from the rinds to infuse into the vinegar. Strain out the rinds and combine the infused vinegar with an equal amount of water. This creates a light, non-porous cleaning solution that smells wonderfully fresh and is excellent for light cleaning tasks on windows, mirrors, and other surfaces where you want a gentle, fragrant clean.
Beyond the Surface: Special Touches for a Fresher Home
Vinegar’s capabilities extend beyond just wiping down counters and scrubbing tubs. You can harness its power to tackle often-overlooked areas and improve the overall freshness and hygiene of your living space.
Mattress Sanitizer: For a Healthier Sleep
Your mattress is where you spend a significant portion of your life, and it can accumulate dust mites, allergens, and odors over time. A simple vinegar solution can help to refresh and sanitize it.
A Gentle Scrub for a Cleaner Mattress
To create a mattress sanitizer, you’ll want a simple 1:1 ratio of white vinegar and water. You can mix this in a spray bottle. Lightly mist the surface of your mattress, avoiding over-saturation, as you don’t want to get the mattress too wet. Gently scrub the sprayed areas with a soft brush or cloth. The vinegar will help to neutralize odors and kill any surface bacteria. Allow the mattress to air dry completely before covering it with bedding. For tougher odors, you can sprinkle baking soda over the mattress after using the vinegar solution, let it sit for a few hours, and then vacuum it up.
Tackling Lingering Odors in Upholstery and Fabrics
Beyond mattresses, vinegar can work wonders on other fabric surfaces that tend to absorb odors, such as sofas, curtains, and carpets.
Using Vinegar for Odor Absorption
For general fabric refreshing, you can use your standard all-purpose vinegar spray (the 1:1 vinegar and water ratio, with optional essential oils). Lightly mist the fabric surface, again, avoiding over-saturation. The vinegar will help to break down and neutralize odor molecules. Allow the fabric to air dry completely. For carpets, you can use a slightly more concentrated solution (around 1:2 vinegar to water) and blot it onto any stained or smelly areas. Always test in an inconspicuous spot first to ensure it doesn’t affect the color or texture of your fabric. The vinegar smell will dissipate as it dries, leaving behind a fresh scent.
The Power of Vinegar: A Sustainable and Smart Choice
| Room | Cleaning Solution | Ingredients |
|---|---|---|
| Kitchen | All-purpose cleaner | Vinegar, water, lemon peel |
| Bathroom | Tile and grout cleaner | Vinegar, baking soda, water |
| Living Room | Glass cleaner | Vinegar, water, rubbing alcohol |
| Bedroom | Fabric freshener | Vinegar, water, essential oil |
You’ve now seen how incredibly versatile and effective white vinegar can be in your cleaning arsenal. From the kitchen to the bathroom, the windows to the upholstery, you have the power to transform your cleaning routine. You’re not only saving money by ditching expensive commercial cleaners, but you’re also making a conscious choice for a healthier home environment and a more sustainable lifestyle.
By embracing these DIY vinegar cleaning solutions, you are actively reducing your exposure to harsh chemicals and minimizing the amount of waste generated by single-use plastic cleaning bottles. The simplicity of the ingredients and the ease of preparation mean that a clean and fresh home is literally at your fingertips.
So, the next time you’re faced with a spill, a smudge, or a lingering odor, reach for that bottle of white vinegar. You have the knowledge and the tools to tackle it effectively and naturally. Experiment with essential oils to personalize your cleaning scents, and enjoy the satisfaction of knowing you’re cleaning your home with a powerful, earth-friendly solution. You’ve unlocked a secret weapon, and your sparkling, fresh-smelling home is the testament to its power.
FAQs
What are the benefits of using vinegar for cleaning?
Vinegar is a natural and non-toxic cleaning agent that is effective at cutting through grease, removing odors, and disinfecting surfaces. It is also environmentally friendly and safe to use around children and pets.
How can I use vinegar to clean my kitchen?
You can use vinegar to clean kitchen countertops, appliances, and floors. Mix equal parts of water and vinegar in a spray bottle to create a general kitchen cleaner, or use undiluted vinegar to tackle tough grease and grime.
Can vinegar be used to clean bathroom surfaces?
Yes, vinegar is an effective cleaner for bathroom surfaces such as sinks, showers, and toilets. It can help remove soap scum, mineral deposits, and bacteria. Simply mix vinegar with water in a spray bottle and use it to clean and disinfect bathroom surfaces.
Is vinegar safe to use on hardwood floors?
Vinegar can be used to clean hardwood floors, but it should be diluted with water to avoid damaging the wood. Mix 1/2 cup of vinegar with a gallon of warm water and use a damp mop to clean hardwood floors.
Are there any surfaces that should not be cleaned with vinegar?
Vinegar is acidic and should not be used to clean natural stone surfaces such as marble or granite, as it can cause etching. Additionally, it is not recommended to use vinegar on egg stains or spills, as the acidity can cause the proteins in the egg to coagulate and make the stain more difficult to remove.