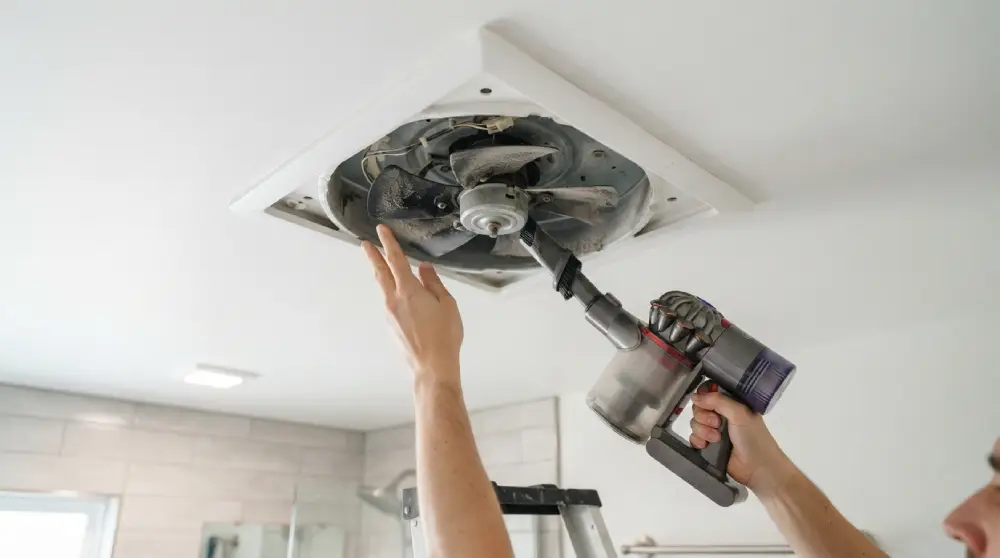
The best way to clean bathroom exhaust fans is to turn off the power, remove the fan cover, wash it with warm soapy water, and vacuum the dust from the blades and housing. A clean exhaust fan runs quieter, pulls moisture out faster, and helps prevent mold from building up in your bathroom. Most homeowners forget about this small appliance until it starts rattling or smelling musty, but a little regular care keeps it working the way it should.
In this guide, you will learn a simple step by step approach to cleaning your bathroom exhaust fan safely, along with tips to keep it running smoothly for years.
Why Cleaning Your Bathroom Exhaust Fan Matters
Bathroom exhaust fans work constantly to remove steam, odors, and excess humidity. Over time, dust and lint settle on the blades and motor housing. This buildup makes the fan work harder, reduces airflow, and can even become a fire hazard in extreme cases.
A dirty fan also struggles to control moisture properly. That trapped humidity often leads to mold and mildew growth on ceilings and walls, which is both unhealthy and unpleasant to deal with later.
Signs Your Exhaust Fan Needs Cleaning
You will usually notice a few warning signs before the fan completely stops working well. These include a rattling or humming noise, visible dust on the cover, weaker airflow than usual, or a musty smell even after the fan has been running.
What You Will Need Before You Start
Before beginning, gather a few basic supplies so you are not stopping midway through the process. You will need a screwdriver, a vacuum with a brush attachment, warm water, mild dish soap, a soft cloth or sponge, and an old toothbrush for tight corners.
Always switch off the power at the breaker if your fan is hardwired, and unplug it if it runs on a separate switch. Safety comes first when working with any electrical fixture.
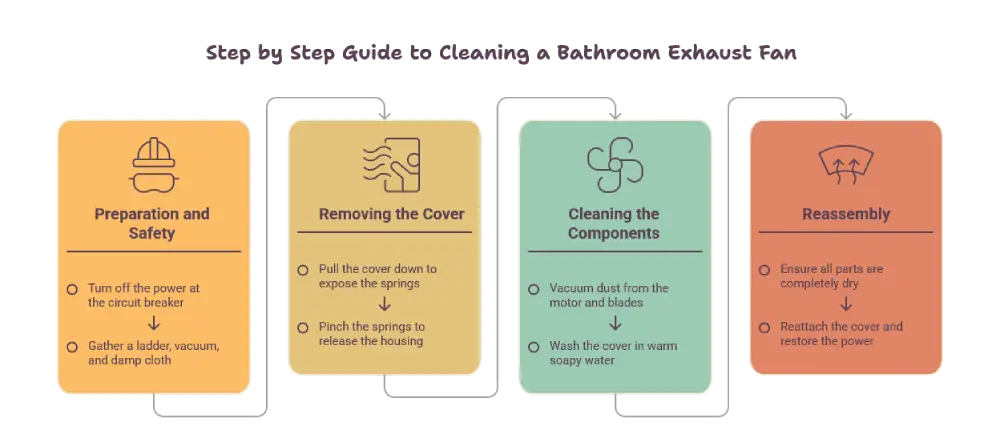
Step by Step Guide to Cleaning a Bathroom Exhaust Fan
Turn Off the Power
Start by switching off the bathroom light switch that controls the fan, and if possible, turn off the breaker as well. This prevents any accidental startup while your hands are near the motor.
Remove the Fan Cover
Most fan covers are held in place with simple spring clips or screws. Gently pull down or twist the cover to release it. If it feels stuck, check the corners for hidden screws before pulling harder.
Wash the Cover Separately
Take the cover to your sink and wash it with warm water and a mild dish soap. A soft sponge works well to remove grime without scratching the plastic. Rinse thoroughly and let it air dry completely before putting it back.
Vacuum the Fan Blades and Housing
While the cover is drying, use a vacuum with a brush attachment to remove dust from the fan blades, motor housing, and surrounding vent. This step alone can dramatically improve airflow since dust buildup is often the main culprit behind weak suction.
Wipe Down the Motor Housing
Use a slightly damp cloth to wipe the motor housing and any visible metal parts. Avoid using excess water near the motor itself, since moisture can damage electrical components.
Clean the Duct Opening
Peek into the duct opening and vacuum out any lint or dust that has collected there. A long, narrow vacuum attachment works best for reaching inside without disturbing the ductwork.
Reassemble and Test
Once everything is dry, snap the cover back into place, restore power, and turn the fan on to confirm it runs smoothly and quietly.
How Often Should You Clean Your Bathroom Exhaust Fan
For most households, cleaning the fan every three to four months keeps it working efficiently. Homes with frequent hot showers or higher humidity levels may benefit from monthly dusting with a vacuum, even if a full deep clean is not needed that often.
Tips to Keep Your Exhaust Fan Running Smoothly
Running the fan for a few minutes after every shower helps clear moisture before it settles on the blades. Keeping the bathroom door open occasionally allows better airflow and reduces strain on the motor. Checking the duct vent outside your home once or twice a year also ensures nothing is blocking proper ventilation.
When to Call a Professional
If the fan continues to make unusual noises after cleaning, or if it stops spinning altogether, it may be time to call an electrician or HVAC technician. Motor issues and wiring problems should always be handled by a professional rather than attempted as a DIY fix.
Conclusion
Cleaning your bathroom exhaust fan is a simple task that makes a noticeable difference in air quality, noise levels, and moisture control. By turning off the power, washing the cover, vacuuming the blades, and checking the duct opening regularly, you can keep your fan running efficiently for years. A few minutes of maintenance every few months goes a long way toward preventing mold, odors, and costly motor problems down the road.
FAQs
How often should I clean my bathroom exhaust fan?
Cleaning it every three to four months is generally enough for most homes, though bathrooms with heavy daily use may benefit from more frequent dusting.
Can I clean the exhaust fan without removing the cover?
You can lightly dust the visible cover, but a proper clean requires removing the cover to reach the blades and motor housing where most buildup occurs.
Is it safe to use water on the fan motor?
No, water should only be used on the removable cover. The motor and internal wiring should only be wiped gently with a dry or barely damp cloth.
Why does my bathroom fan make noise even after cleaning?
Persistent noise after cleaning usually points to a worn motor bearing or loose mounting bracket, which may require professional inspection.
Does cleaning the exhaust fan improve air quality?
Yes, a clean fan removes moisture and odors more effectively, which helps reduce mold growth and keeps the bathroom air fresher.
Image prompt for Google Flow:
Image alt text: